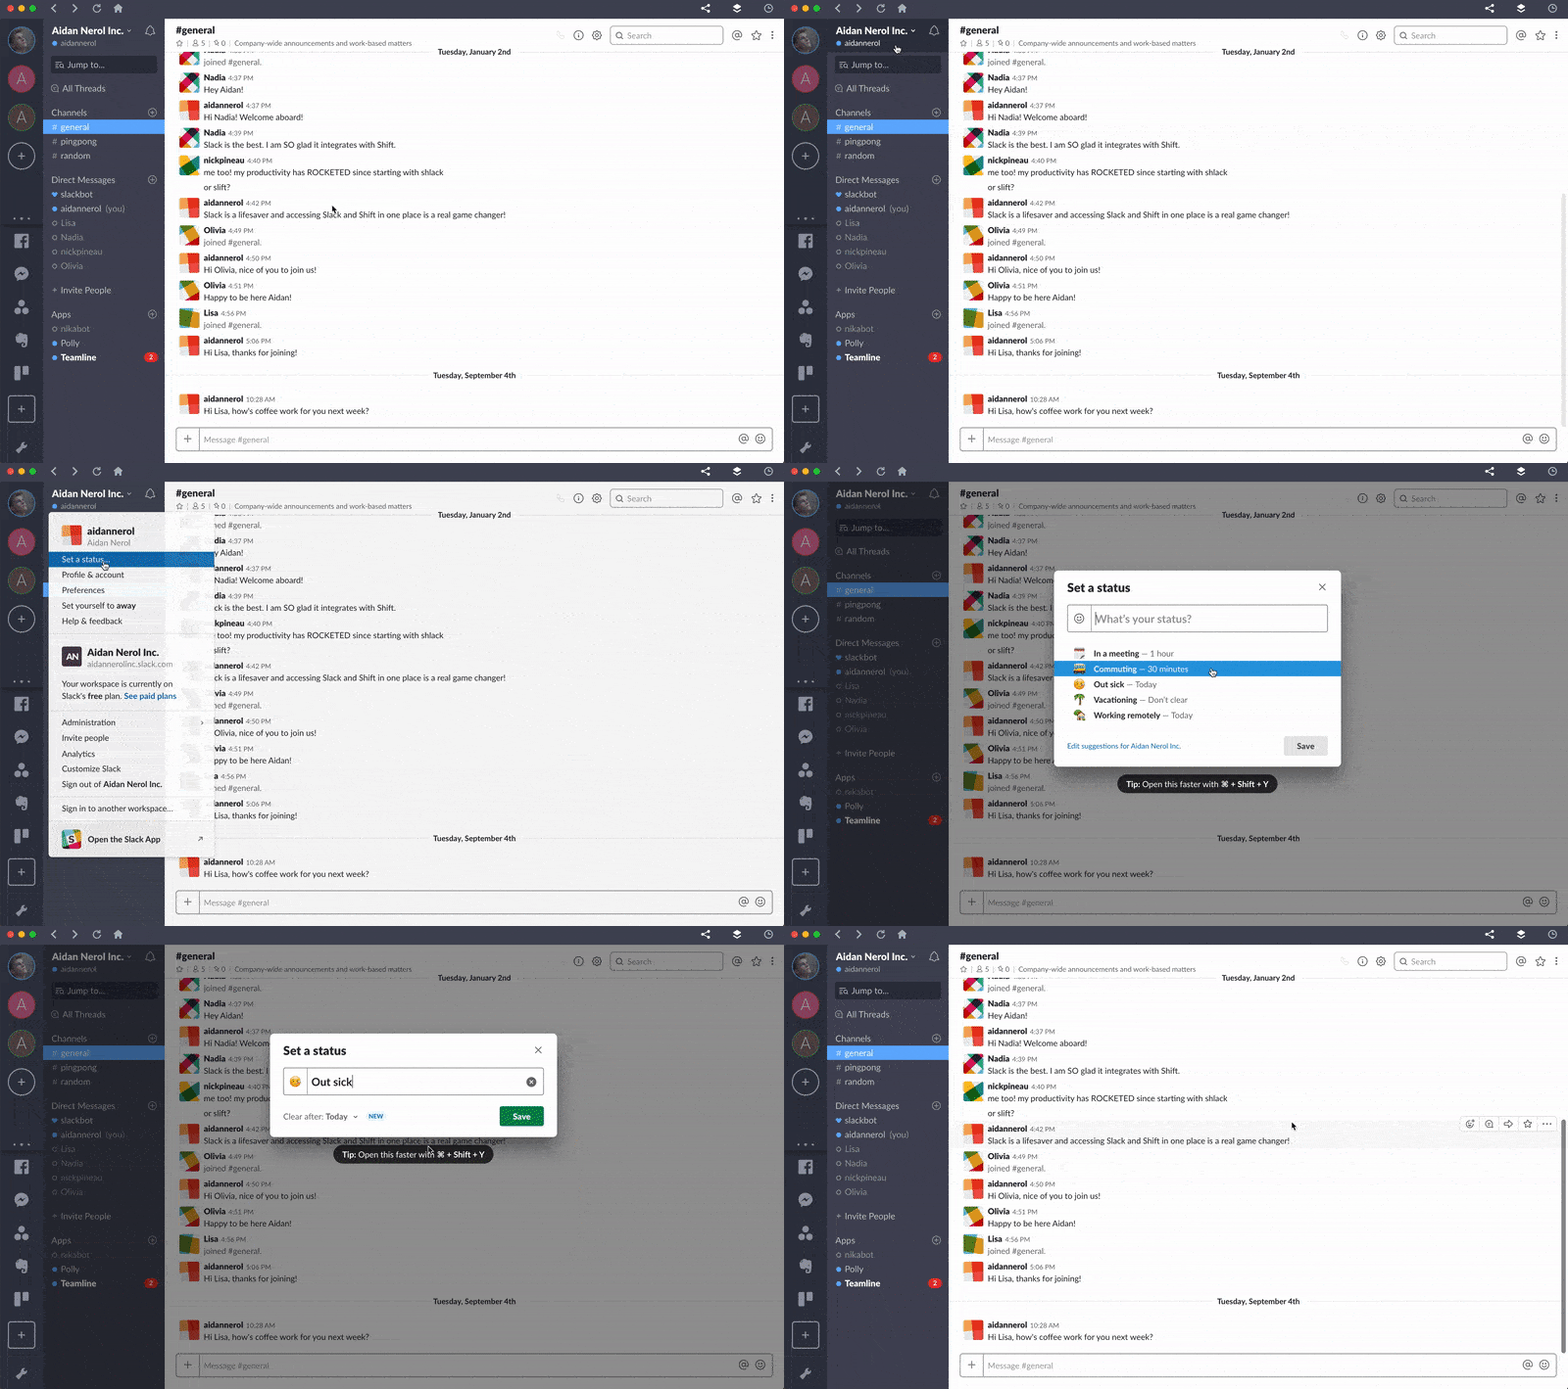
Busy? On vacation? Let your teammates know that you're occupied with a simple Slack status. When your work is getting on top of you, it's easier to let everyone know via a status than individual messages. Otherwise, that's just one more thing you have to do when you don't have the time to.
Slack gives us a couple of options to share where you are, how you are, why you are where you are, and so on. Slack status is a customizable message that lets your team know what you're up to.
Note: Status messages have to be set to each workspace if you're operating on multiple Slack workplaces at once with Shift.
Setting up your Slack status
As well as the ability to customize your own statuses, Slack already has several popularly used presets for you to use.
 Using a preset status
1. Launch Shift and open your Slack workplace
2. Click the name of your Workplace
3. Go to "Set a Status ..."
4. Under Set a status, select one of the suggested statuses (eg. In a meeting, Commuting)
Note: You can change and set your preset statuses by clicking Edit suggestions for [workplace name].
 Using a custom status
1. Launch Shift and open your Slack workplace
2. Click the name of your Workplace
3. Go to "Set a status ..."
4. Type whatever you want into the text box
5. Click the emoticon to the left to select a matching emoji
Using a custom emoji with your status
If you've added custom emojis to your Slack with us, you can also use it next to your status.
1. Go to "Set a status..."
2. Click the emoticon
3. Click the Slack icon tab "#"
4. Your custom emojis will be right there waiting!

Adjusting the time window
Vacation brain often gets the best of us and we might forget to disable the status after returning. Luckily, Slack has a feature where you can set up a specific timeframe. When the time runs out, your status will automatically disappear too.
Setting the time window is also super easy:
1. Firstly, Go to "Edit status..."
2. Beneath the input box, you'll see the "Clear after" function
3. Choose how long you want the status to last
Note: As well as being able to choose a few hours, days, or a week, you can also select your own date and time. Nobody wants to Slack when they're actually slacking on vacation, am I right?
Now that you have mastered Slack statuses, make sure to hop on your Shift and set the status to all applicable workplaces. Not using Shift to manage your Slack workplaces yet? Download Shift now and start saving time!


 Share on Facebook
 Share on Twitter


